The poll is a campaign type for quickly creating on-brand polls that engage target audiences, and collect user data and campaign results with built-in analytics.
The poll creation process can be completed in a few easy steps. Once you feel ready to go live, you'll receive an embeddable widget to integrate your custom, reusable poll into your website or app.
How to Add a New Poll
Adding a new poll is a simple first step in the poll creation process.
To add a new poll, you'll need to sign in to Engage and click Create New Campaign. You will select Poll as the campaign type, then add the title and description and click Create.
The full process of adding the new poll is available on the following page.
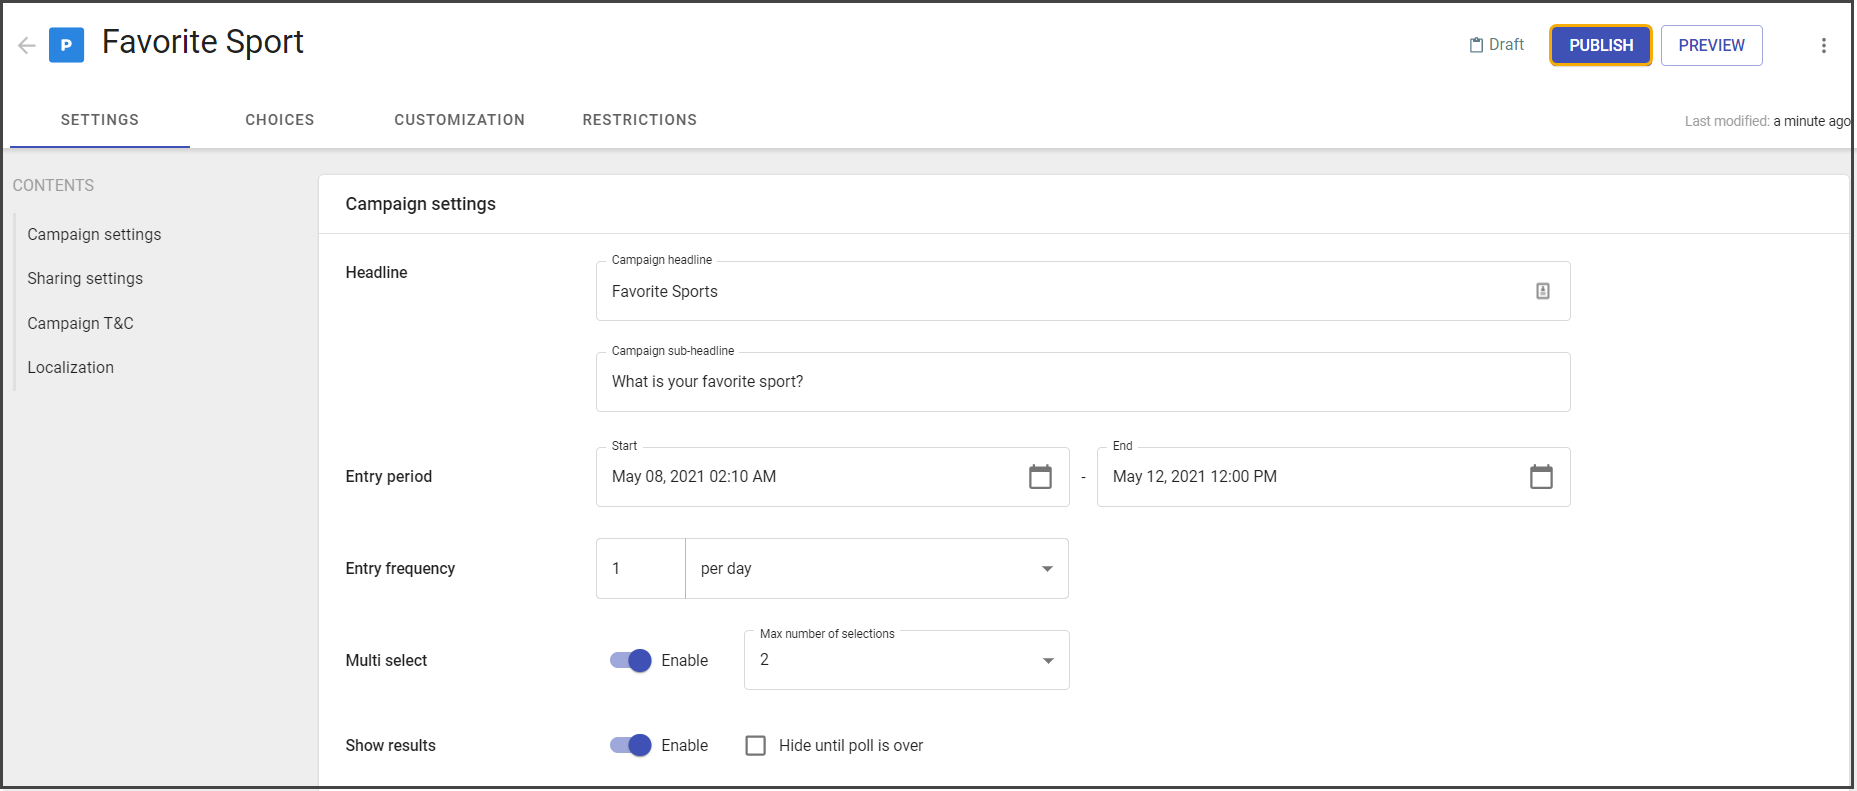
Poll settings
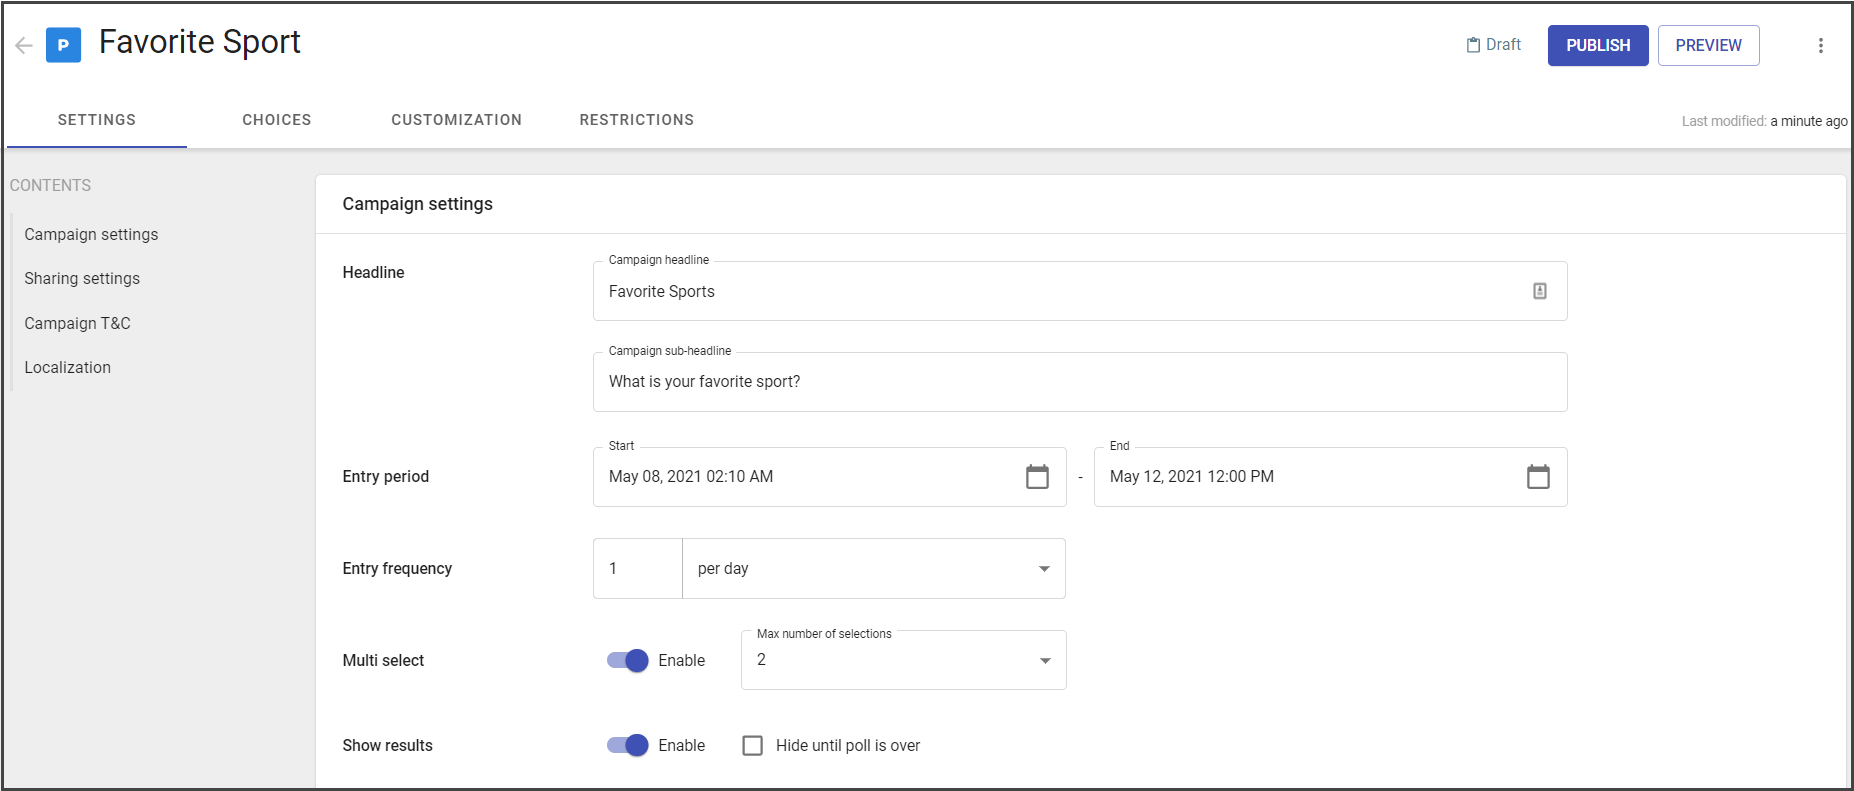
After creating a new poll, you will be taken directly to the Settings tab.
Here you have optional fields for headline and sub-headline, entry period, entry frequency, multi-selections, and results display.
Additionally, it contains sharing settings and campaign Terms and Conditions.
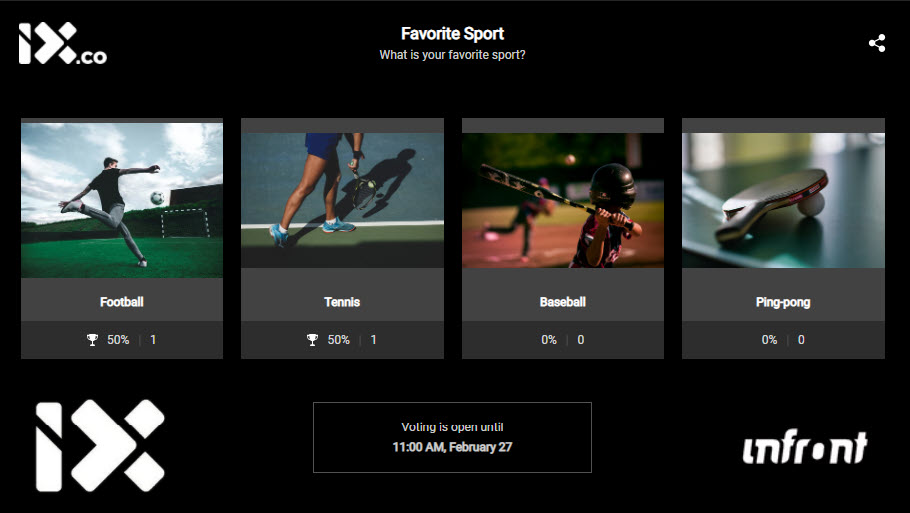
The campaign headline and sub-headline are visible on the end-user widget.
The entry period regulates the period for submitting answers. Entry frequency regulates how many votes the user can submit.
The full description of the campaign settings is given here.
Choices setup
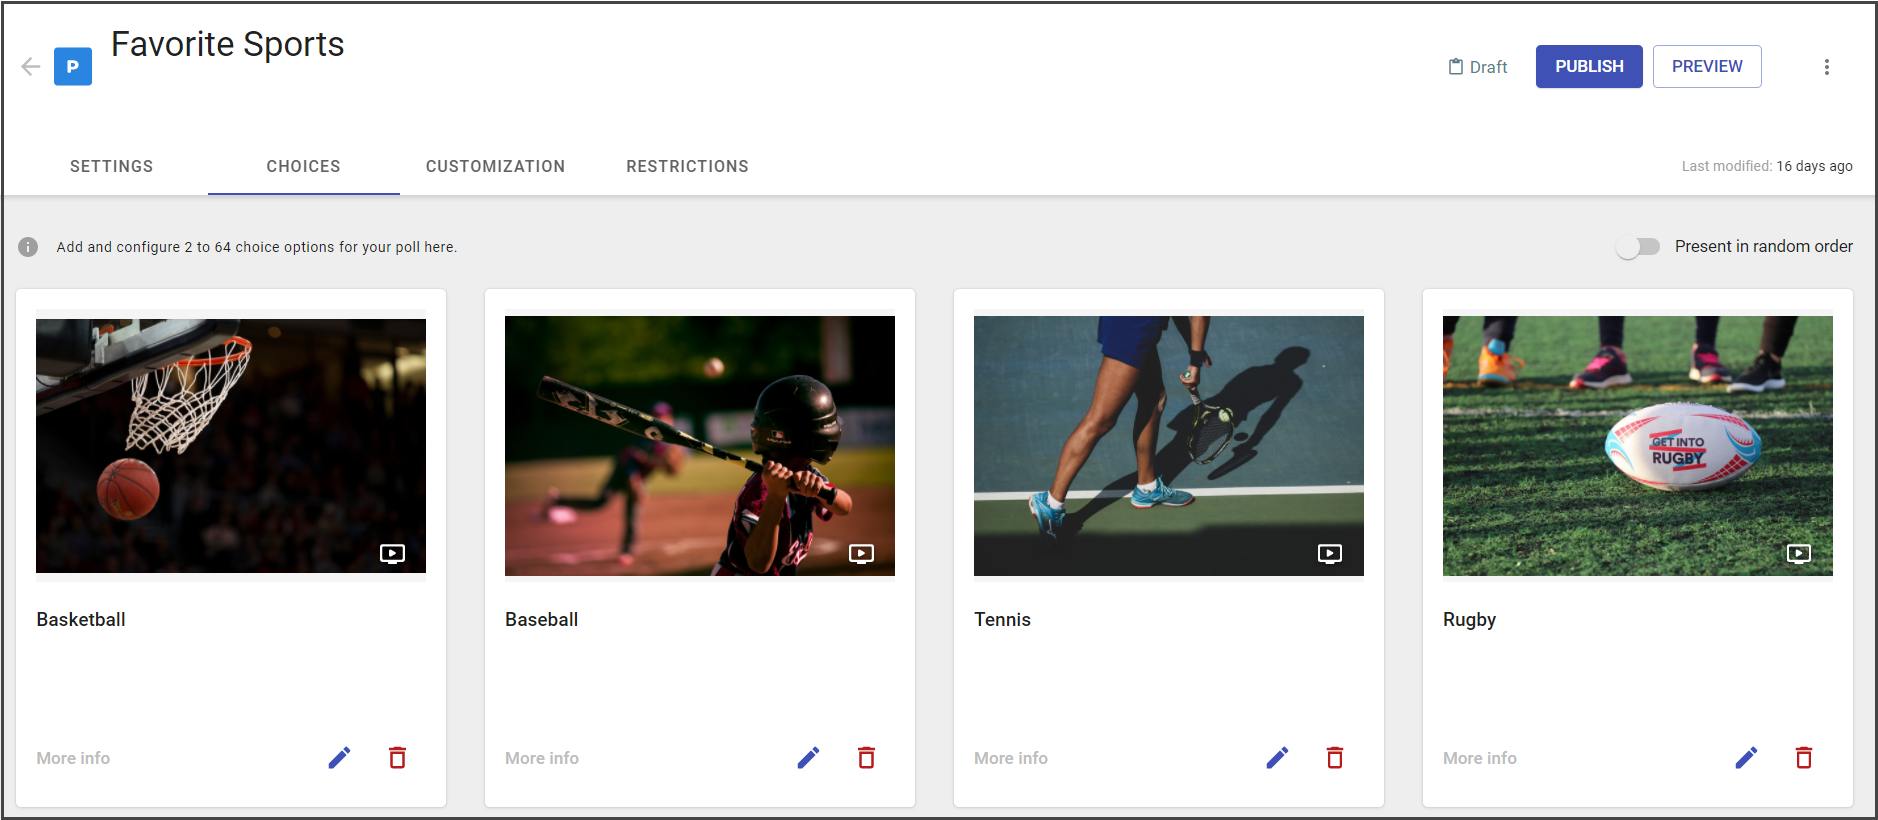
The poll choices are added to the Choices tab. The widget can contain from 2 up to 64 choices, each one with its own image, description, and link.
Choices could be added at any campaign state, but could not be removed after the campaign in the published state.
To get more details about choices setup see the following page.
Customization
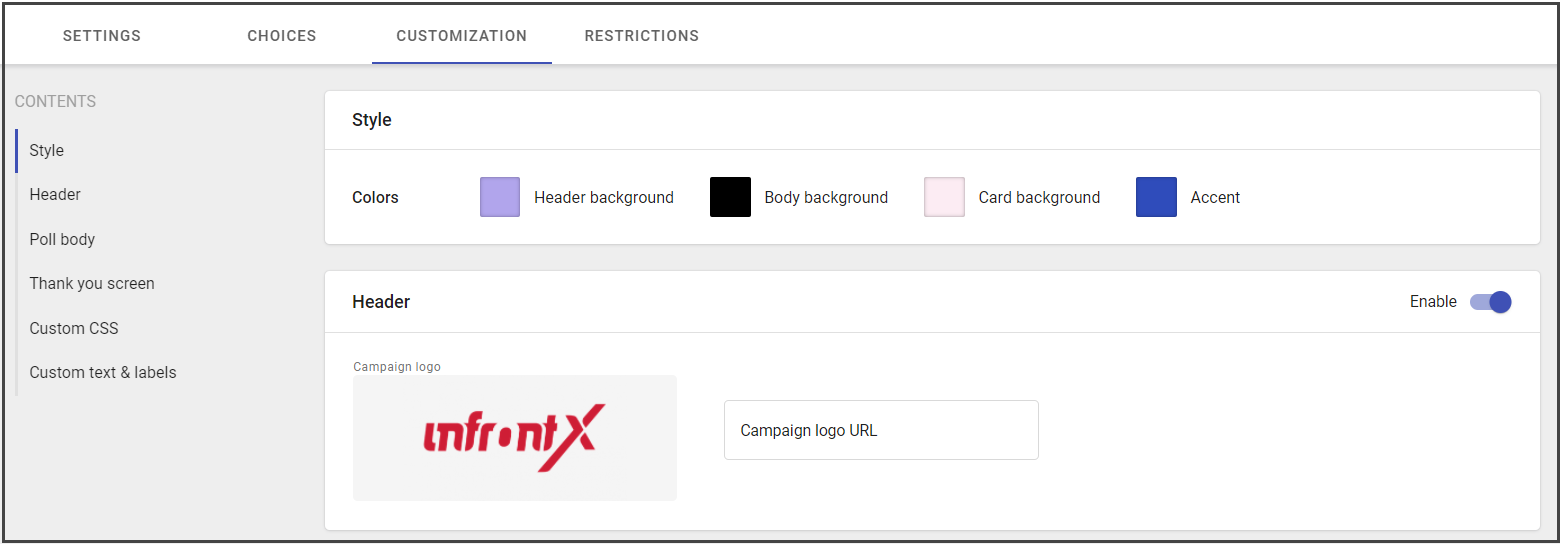
You can fully customize your poll with specific styles, fonts, colors, logo images, sponsor (promo) images, and background skins.
See more tips on customization in the following chapter.
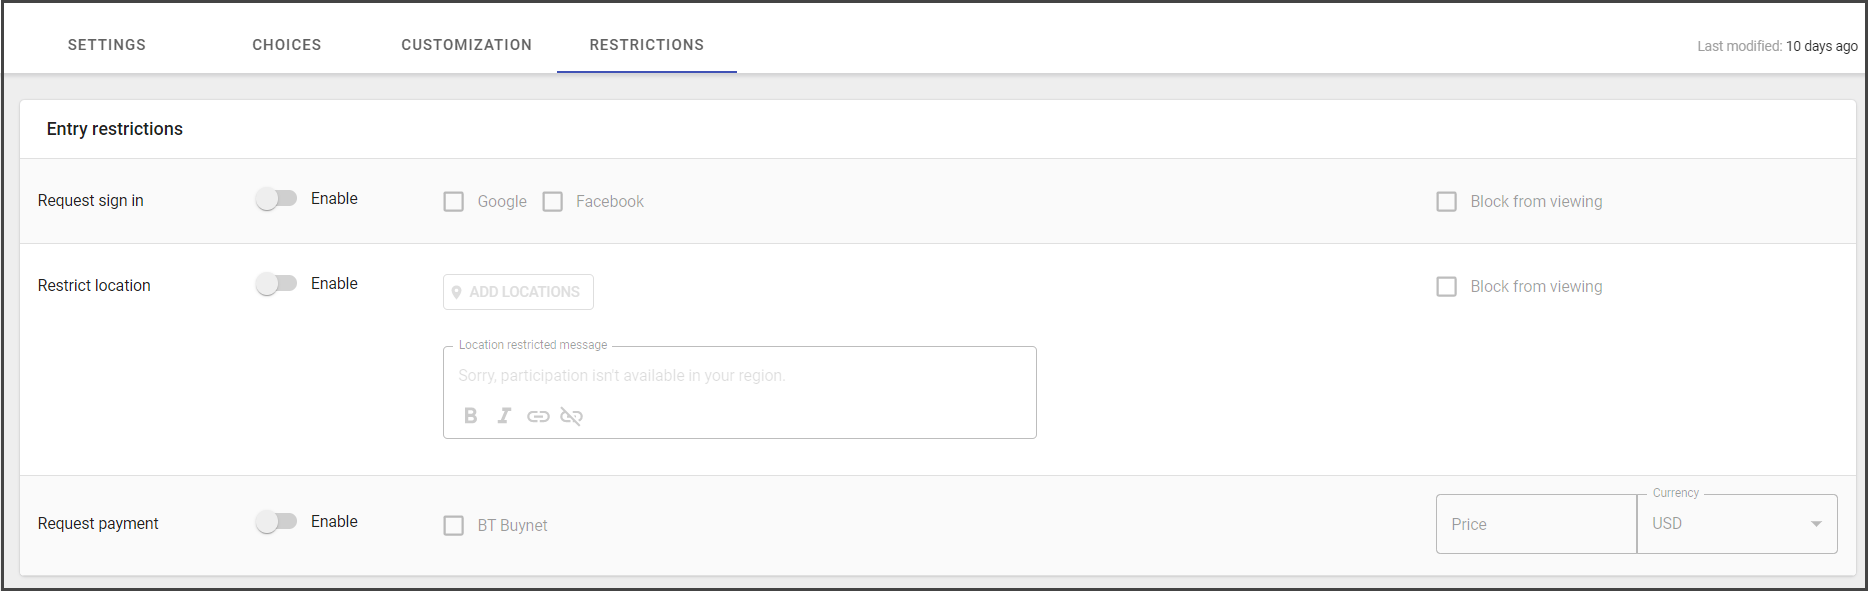
Restrictions
Poll restrictions are useful for those who need sign-in, vote or view limitations for the widget.
The widget could be fully hidden from view at specific locations or before sign-in.
The sign-in may be required before voting or even before viewing the widget.
The full restrictions setup is available in this chapter.
Publishing poll
Your campaign will remain in the Draft state until you click Publish.
To publish the campaign, save changes and click Publish.
From here, you can:
- continue to edit your campaign
- embed the widget on your site or app
- duplicate the same poll.
Running poll
To run a poll, copy its embed code and add it to the target webpage. To get more information about an embed code, see the following page.
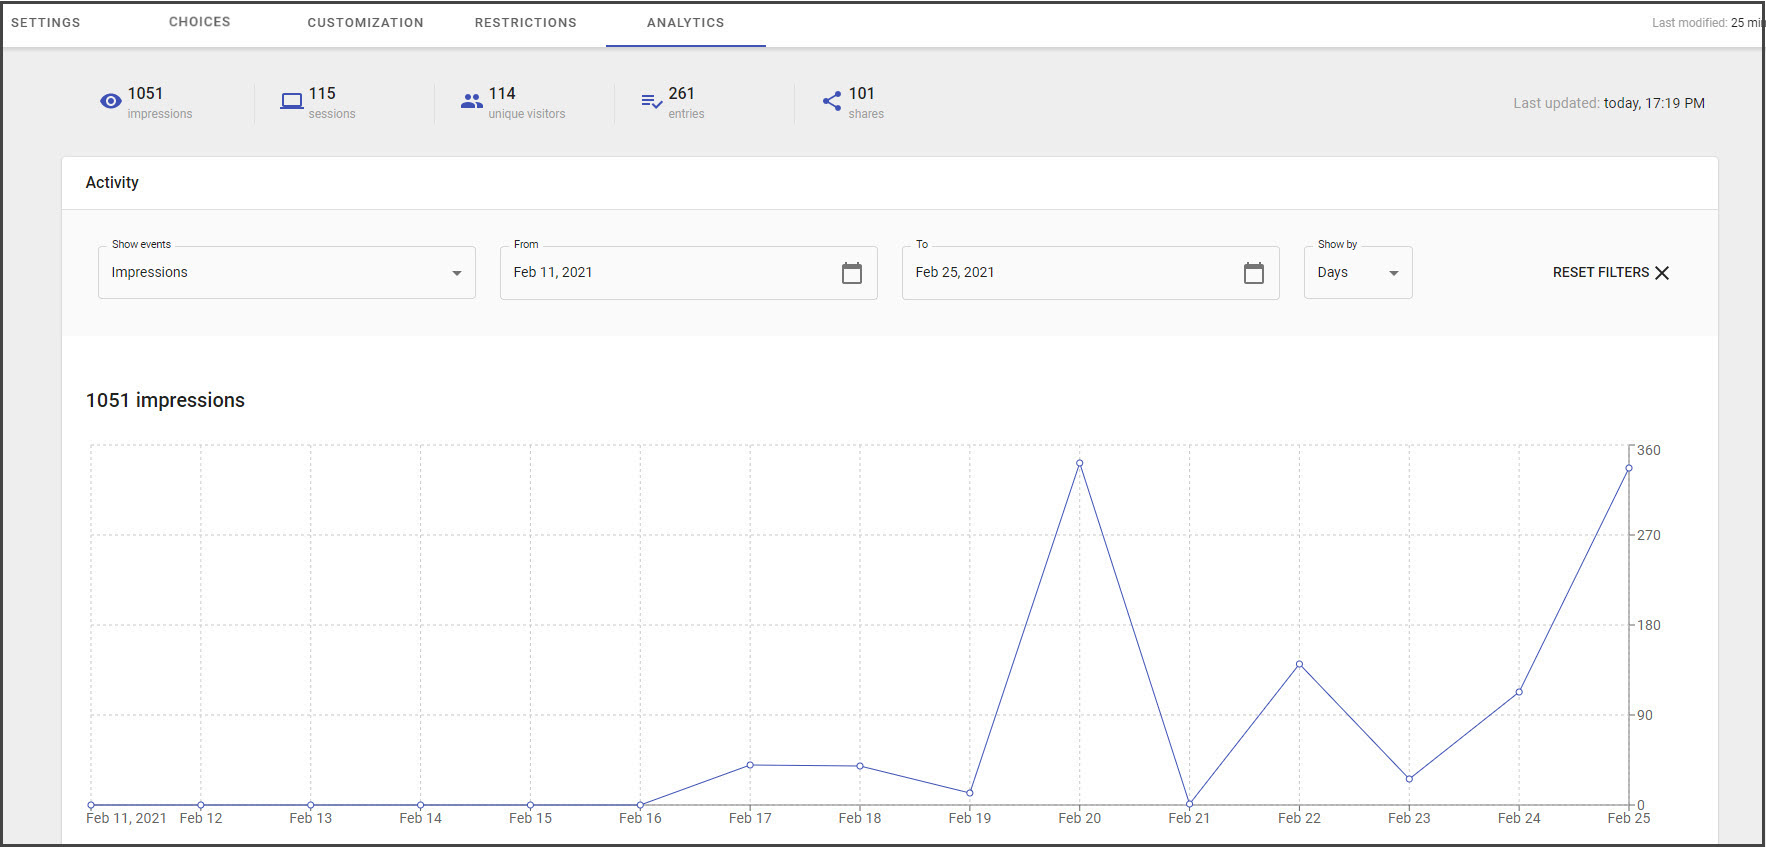
Analytics
The analytic data collection starts after the poll is published, embedded onto the website and the entry period has started. It shows statistics on impressions, sessions, unique visitors, entries, and shares. Also, it contains statistics on poll results.
See more information about analytics here.